RV Solar Power Setup: Complete Installation Guide
Installing solar power on your RV is one of the best investments for freedom and self-sufficiency. Whether you're planning extended boondocking adventures or simply want backup power, a properly designed solar system provides reliable electricity without generator noise or campground hookups. This comprehensive guide walks you through planning, component selection, and installation.
Understanding Your Power Needs
Before buying panels and batteries, calculate your daily power consumption. List every device you'll use and estimate daily hours of operation.
Sample Power Calculation
- LED Lights (4 bulbs @ 5W each, 5 hours): 100 watt-hours
- Laptop (50W, 6 hours): 300 watt-hours
- Phone Charging (10W, 2 hours): 20 watt-hours
- 12V Fridge (60W average, 24 hours): 1,440 watt-hours
- Water Pump (occasional use): 50 watt-hours
- Fans (30W, 8 hours): 240 watt-hours
- Total Daily: ~2,150 watt-hours
Add 20-30% buffer for inefficiencies and cloudy days. For this example, plan for 2,700 watt-hours (2.7 kWh) daily capacity.
System Components Explained
Solar Panels
Panels convert sunlight to electricity. Three main types exist:
- Monocrystalline: Most efficient (18-24%), better in low light, higher cost. Best choice for RVs with limited roof space.
- Polycrystalline: Lower efficiency (15-18%), cheaper, slightly lower performance. Good budget option with adequate roof space.
- Flexible/Thin Film: Lightweight, walkable, least efficient (10-13%). Good for curved roofs or weight-sensitive applications.
Sizing Recommendation: For 2,700 watt-hours daily, install 400-600 watts of panels. Accounts for inefficiencies and non-ideal sun angles. More is better—you can't have too much solar!
Charge Controllers
Regulate power from panels to batteries, preventing overcharging damage.
- PWM (Pulse Width Modulation): Cheaper ($30-100), less efficient, works for small systems. Panel voltage must match battery voltage.
- MPPT (Maximum Power Point Tracking): More expensive ($150-400), 20-30% more efficient, can handle higher voltage panels. Strongly recommended for systems over 200 watts.
Size controller for 25% more than panel wattage. A 600-watt system needs 750+ watt controller capacity for safety margin.
Batteries
Store energy for nighttime and cloudy day use. Battery technology significantly impacts system performance.
- Lead-Acid (AGM/Gel): Cheaper ($100-300 per 100Ah), heavier, 50% usable capacity, shorter lifespan (3-5 years), temperature sensitive.
- Lithium (LiFePO4): Expensive upfront ($800-1,200 per 100Ah), lighter, 80-100% usable capacity, longer lifespan (10+ years), better performance.
Battery Bank Sizing: For 2,700 watt-hours daily consumption at 12V system:
- Lead-acid: 450Ah minimum (only 50% usable)
- Lithium: 270Ah minimum (80% usable)
Build in buffer for cloudy days—double these capacities for 2-day autonomy.
Inverter
Converts 12V DC battery power to 120V AC for standard appliances. Not always necessary—many RV appliances run on 12V or propane.
Sizing: Calculate maximum simultaneous AC load. Common choices:
- 1000W: Laptop, TV, phone charging
- 2000W: Add microwave, coffee maker
- 3000W: Add hair dryer, some air conditioners
Pure sine wave inverters ($200-800) required for sensitive electronics. Modified sine wave damages some devices.
Roof-Mounted vs. Portable Systems
Roof-Mounted (Permanent)
Pros: Set-and-forget, works while driving, no setup/takedown, secure from theft
Cons: Requires roof penetrations, cannot reposition for optimal sun, more expensive installation
Portable Panels
Pros: No roof modifications, reposition for shade parking, use while RV parked in shade, easier to replace
Cons: Setup/takedown required, theft risk, cable management, storage space needed
Best Solution: Many RVers use both—permanent panels for baseline power, portable for extra capacity when needed.
Installation Process
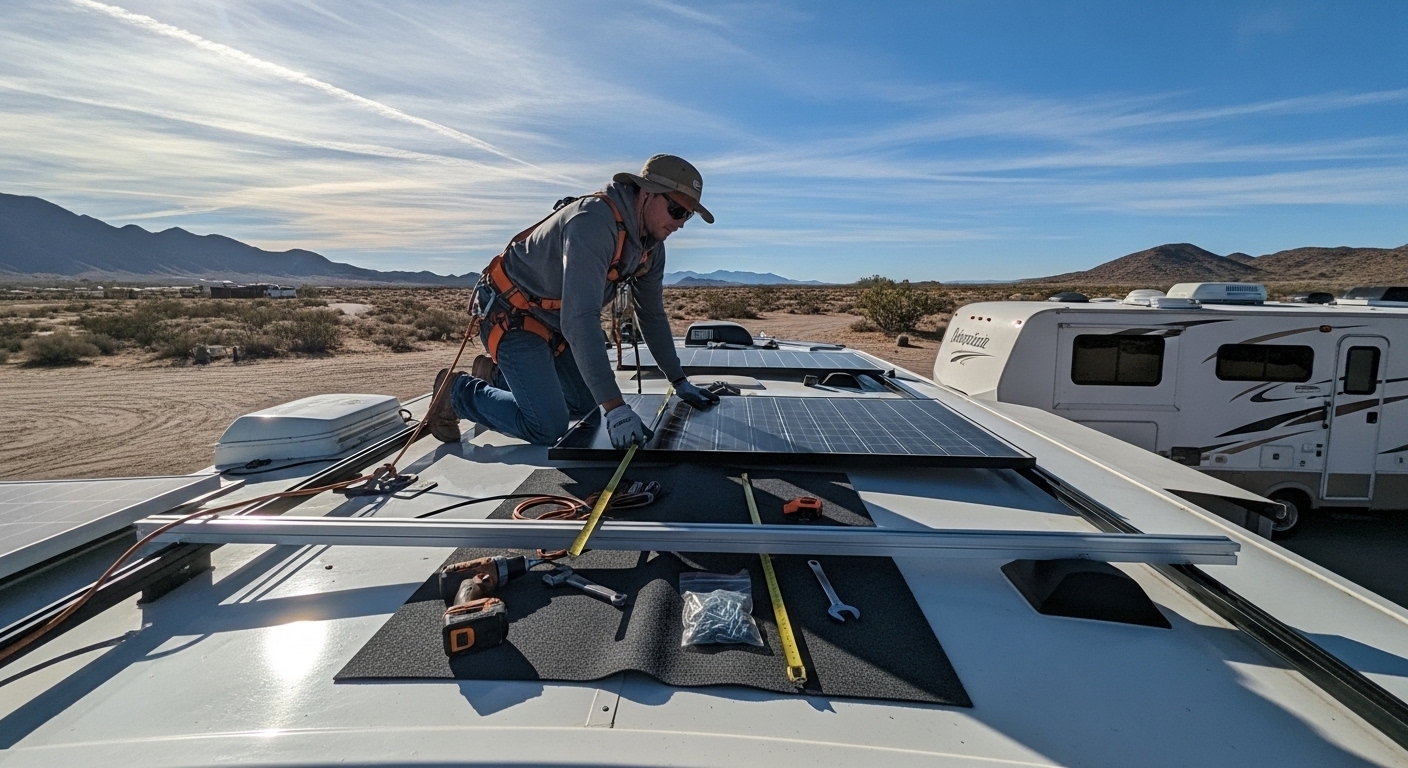
Planning and Design
- Measure roof space, note obstacles (vents, AC, antenna)
- Plan panel layout for maximum exposure
- Route wire paths from roof to battery compartment
- Choose mounting method (flat, tilt, or flexible)
- Order all components with 25% capacity buffer
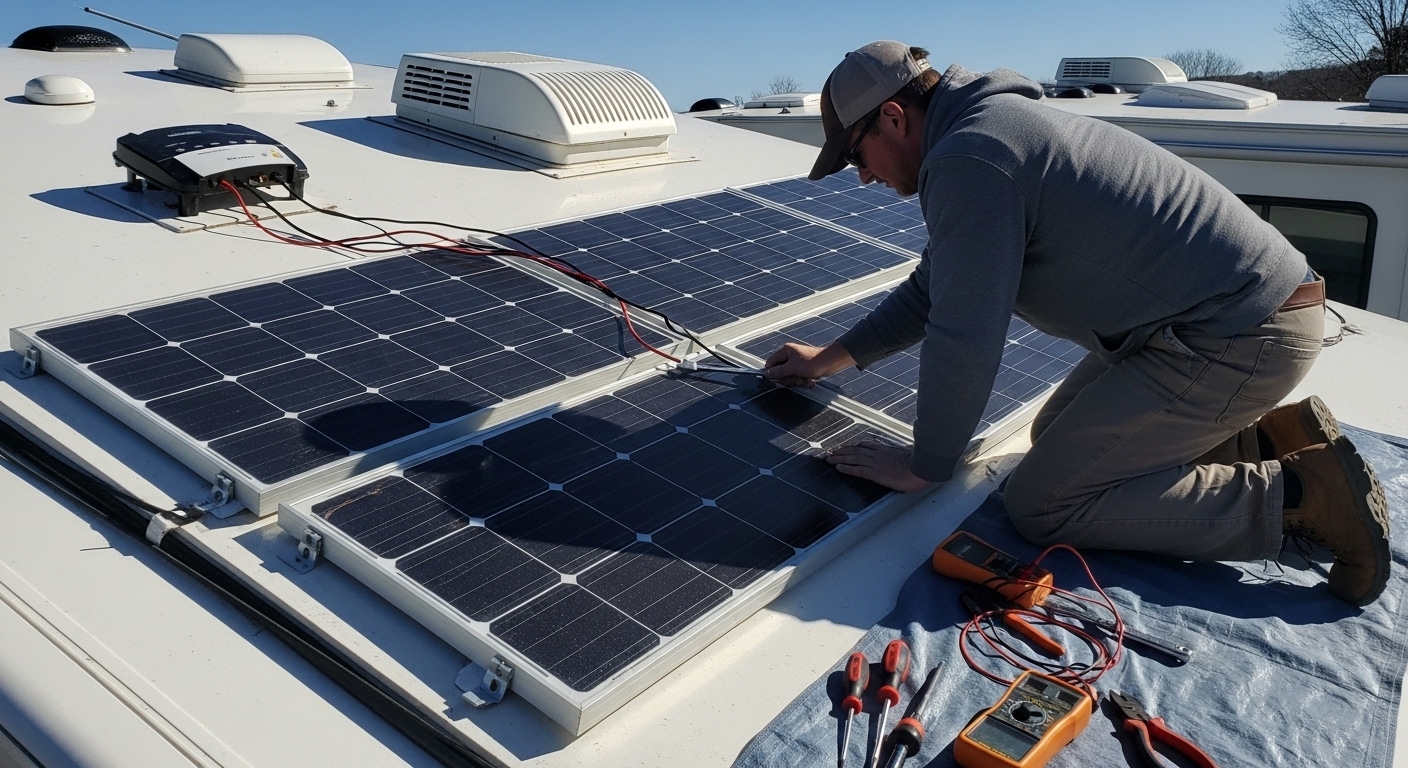
Roof Installation Steps
- Clean roof thoroughly where panels will mount
- Install mounting hardware using appropriate sealant (Dicor for EPDM roofs)
- Attach panels to mounts following manufacturer specs
- Drill cable entry hole through roof, seal with cable gland
- Wire panels in series or parallel based on charge controller requirements
- Run cables through roof to interior, seal all penetrations
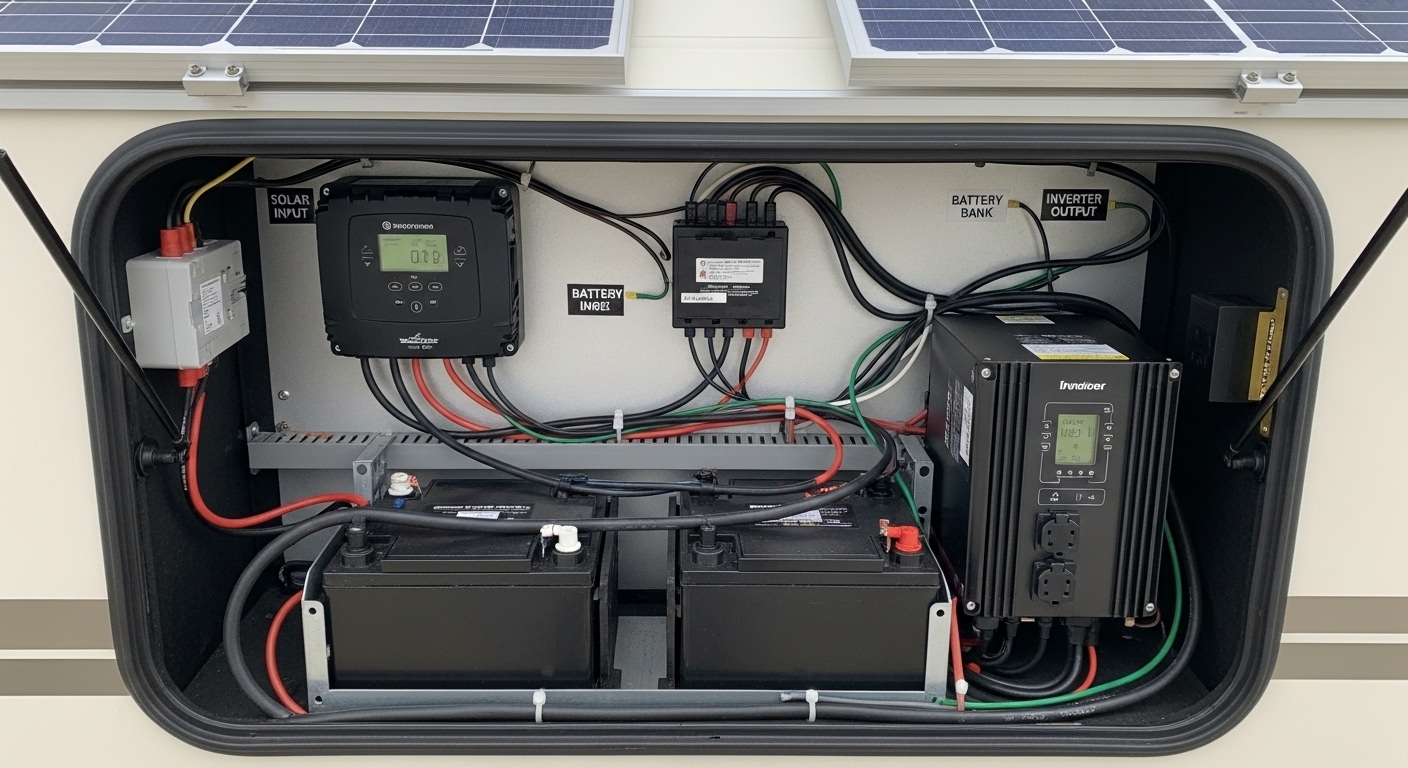
Electrical Installation
- Mount charge controller near batteries, well-ventilated area
- Connect batteries first, then solar panels (prevents sparking)
- Use proper wire gauge—undersized wire causes voltage drop and fire hazard
- Install fuses/breakers on all positive connections
- Connect monitoring display to track system performance
- Install inverter (if using) near batteries with dedicated circuit
Wire Sizing Chart
Use 10 AWG minimum for panel to controller, 4 AWG for battery to inverter (2000W). Shorter runs can use thinner wire; longer runs need thicker.
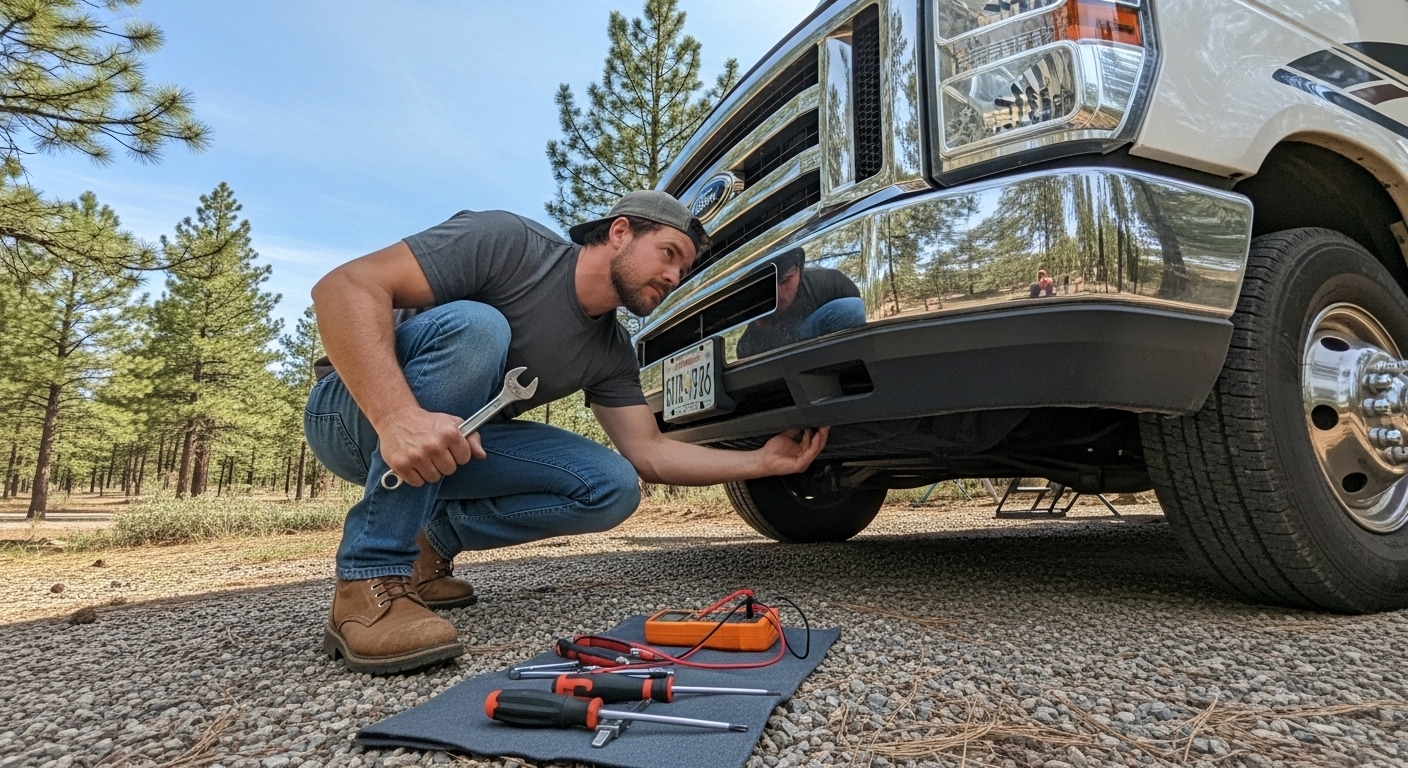
DIY vs. Professional Installation
DIY Advantages
- Cost savings: $500-2,000 in labor
- Learn your system thoroughly
- Customize for specific needs
- Satisfaction of self-sufficiency
Professional Advantages
- Warranty protection (self-install may void warranties)
- Proper sealing techniques
- Code compliance
- Faster completion
Recommendation: Confident DIYers can handle installation following instructions carefully. However, hire professionals if you're unsure about electrical work or roof penetrations—mistakes are expensive.
System Monitoring and Maintenance
Monitoring Equipment
Install a battery monitor (Victron BMV or similar) to track:
- Current battery state of charge (%)
- Amps flowing in/out
- Daily power consumption
- Historical data trends
This information helps adjust usage and prevent battery damage from over-discharge.
Maintenance Tasks
- Monthly: Clean panels with water, check all connections
- Quarterly: Inspect roof seals, verify controller settings
- Annually: Check battery health, test system capacity, inspect all wiring
Lithium batteries require minimal maintenance. Lead-acid needs water level checks (flooded type) and equalization charges.
Typical System Costs
Basic 200W System
- 2x 100W panels: $200
- PWM controller: $50
- 200Ah lead-acid batteries: $400
- Wiring/mounting: $100
- Total: ~$750
Mid-Range 400W System
- 4x 100W panels: $400
- MPPT controller: $300
- 300Ah lithium battery: $2,400
- 2000W inverter: $500
- Wiring/mounting: $200
- Total: ~$3,800
Premium 800W System
- 8x 100W panels: $800
- MPPT controller: $600
- 600Ah lithium batteries: $4,800
- 3000W inverter: $1,200
- Wiring/monitoring: $400
- Total: ~$7,800
Prices vary based on brands and quality. Budget systems work fine for weekend camping. Serious boondockers should invest in quality components.
Common Mistakes to Avoid
- Undersizing system: Better to oversize capacity than constantly run low on power
- Cheap controllers: Quality MPPT controller worth the investment
- Wrong wire gauge: Voltage drop reduces efficiency; undersized wire dangerous
- Poor roof sealing: Water damage costs more than proper installation
- Mixing battery types: Never mix old and new, or different chemistries
- No monitoring: Flying blind leads to battery damage
- Ignoring shading: Partial shade dramatically reduces output
Maximizing Solar Efficiency
- Park facing south (Northern Hemisphere) when possible
- Avoid shaded campsites—even partial shade kills production
- Keep panels clean—dirty panels produce 20-30% less power
- Angle panels toward sun if using tilt mounts (portable systems)
- Reduce consumption during cloudy periods
- Run high-draw items during peak sun hours
Solar power transforms RV living, providing quiet, clean, renewable energy wherever you roam. While initial investment seems high, most RVers recoup costs within 1-2 years through free camping opportunities. Calculate your needs, choose quality components, install carefully, and enjoy the freedom of solar-powered adventures. Welcome to off-grid independence!